Last Updated: December 3rd, 2022
Want to enable virtualization on Windows 10? The ability to create virtual machines is one of the features introduced in Windows 10. A virtual machine is a computer system that is emulated using software. They are built within a real or physical computer, allowing you to construct numerous “computers” with various operating systems and apps. A piece of software known as a Hypervisor is used to manage these virtual computers. In this case, Hyper-V is owned by Microsoft.
Virtual machines cannot be run on all systems due to the sophisticated nature of virtualization. Previously, this capability was only available to servers. Users of operating systems such as Windows 10 can, however, construct their own virtual computers. Check out the free Windows alternative open-source operating system.

Requirements to enable virtualization:
- Pro or Enterprise editions of Windows 10
- Second Level Address Translation on a 64-bit CPU (SLAT)
- At a bare minimum, your machine should have 4GB of RAM.
- Hardware virtualization is supported at the BIOS level.
Enable Hardware Virtualization on Windows 10:
While most modern PCs offer hardware virtualization, not all computer makers enable it out of the box. If the choices are present, the configuration might be referred to as VT-x, AMD-V, SVM, Vander pool, Intel VT-d, or AMD IOMMU. If you can’t locate Virtualization settings in your BIOS, it’s possible that your computer doesn’t support it. You can, however, see if your Windows 10 PC supports HAV.
It’s conceivable that your machine utilizes UEFI instead of BIOS if there are no choices to access the BIOS before your OS loads. Before the OS runs on a UEFI-based computer, there is typically no button click prompt. Instead, you’ll access these options through the operating system.
To reboot directly to that menu on a Windows machine, hold down the Shift key when clicking Restart in Windows.
Click the Troubleshoot tile, then Advanced Options.
Then UEFI Firmware Settings.
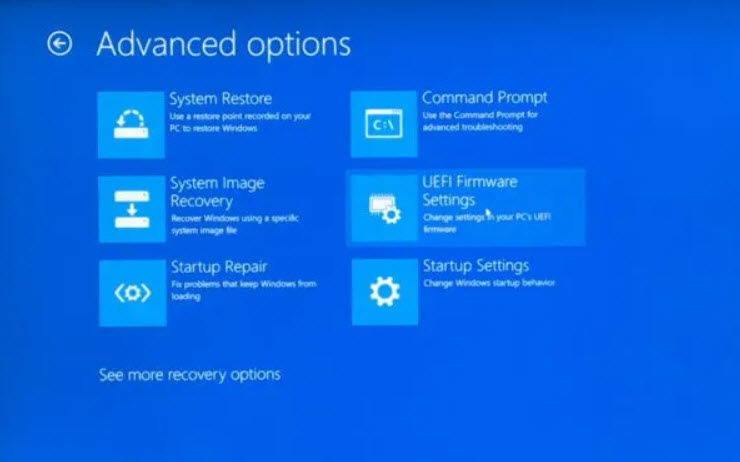
Now, go to the UEFI Firmware Settings.
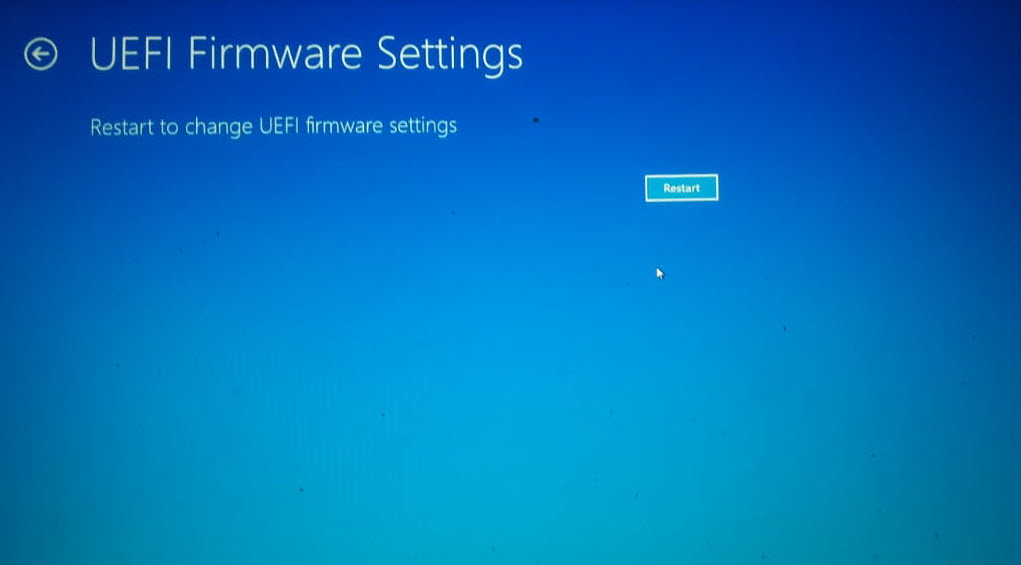
After that, select Restart to reboot your machine into its UEFI firmware settings screen.
Check Hardware Virtualization support:
First and foremost, ensure that your equipment is capable of hardware virtualization. You may also check the BIOS or UEFI firmware settings to see whether it’s enabled.
- Launch Command Prompt and enter the command systeminfo.

2. Wait for few minutes, you will get a display of all the information including Virtualization.

Whether Virtualization is enabled in Windows 10 or not can also be checked by going to the Performance Tab in the Task Manager.
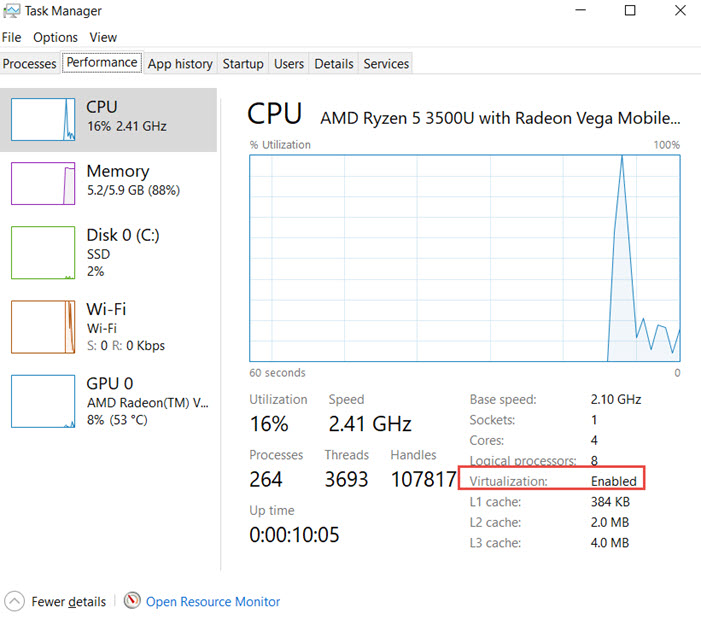
How to check the Windows version of your computer?
Follow the below procedures to determine which Windows version you have.
Step 1: Find the Control Panel in the Search bar and open it.
Step 2: Select System from the Control Panel once it has been opened.
Step 3: In the System panel, you can see what Windows version your machine is running and what sort of processor (CPU) it has.
Using the BIOS to Enable Virtualization On Windows 10
When you switch on your computer, the BIOS is a tiny software that executes. Its primary purpose is to assist the computer in booting up by ensuring that everything is in working order. It does, however, manage certain specific The BIOS screen and options are different on each PC. In addition, the methods to activate virtualization from the BIOS vary for each PC manufacturer. BIOS settings are normally accessible at boot using the function keys (F1, F2, F3, F10, or F12). On certain PCs, the ESC (or Delete) key is used. Some of the functions must be enabled to function properly on your computer. Virtualization is one prominent example.
Moreover, the key varies from one manufacturer to the next, and even among the same company’s devices. Still, if you don’t know the proper key for your system, look it up on the internet. As soon as your computer’s screen turns on, touch the key roughly twice per second. This may be done more easily and universally from the Windows 10 Settings app.
Step 1: Turn on your computer and go to the BIOS configuration menu. This is accomplished by hitting a key shortly after the computer has been switched on. The key you must press varies depending on the OS, but it is generally F2, F10, or Delete. To enter the setup, most systems will inform you which key to hit, or you may reference your computer handbook.
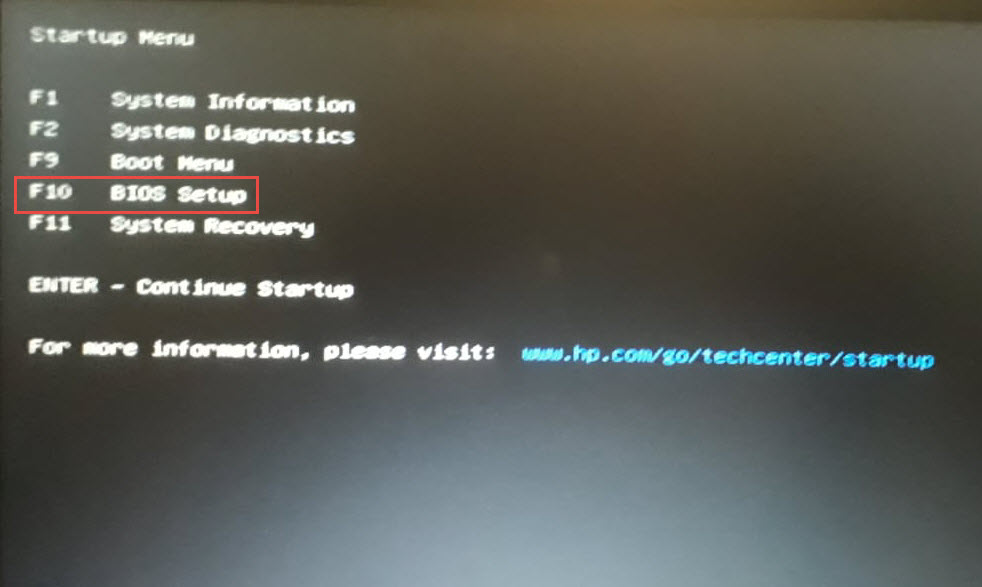
Step 2: Enable all virtualization options after opening the BIOS setup. The BIOS changes a lot from one machine to another, depending on the manufacturer.
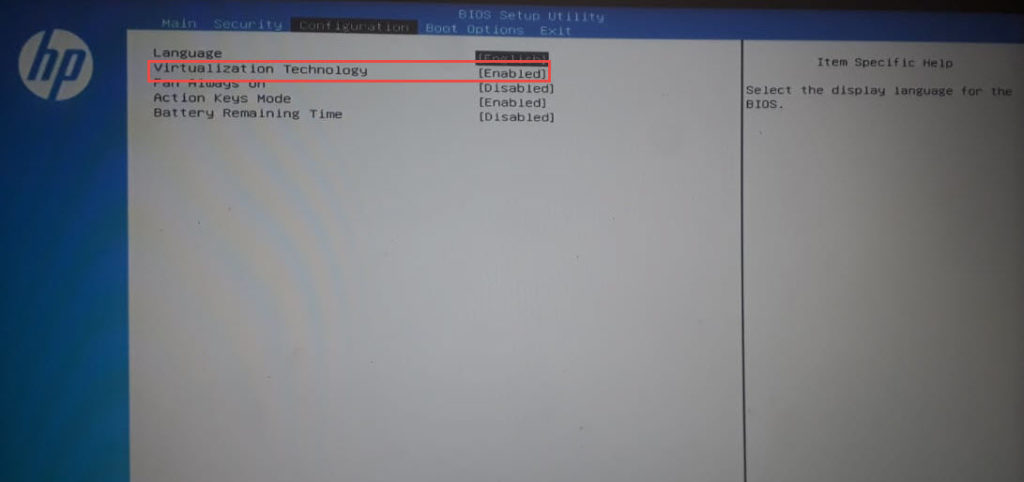
Step 3: Save and quit the BIOS configuration after activating all essential options. F10 is generally used to do this. The computer will restart after that.
Configuring the Hyper –V:
Microsoft Hyper-V must be installed to construct and administer virtual machines. Follow these procedures to do this.
Step 1: Find the Control Panel in the Search bar and open it.
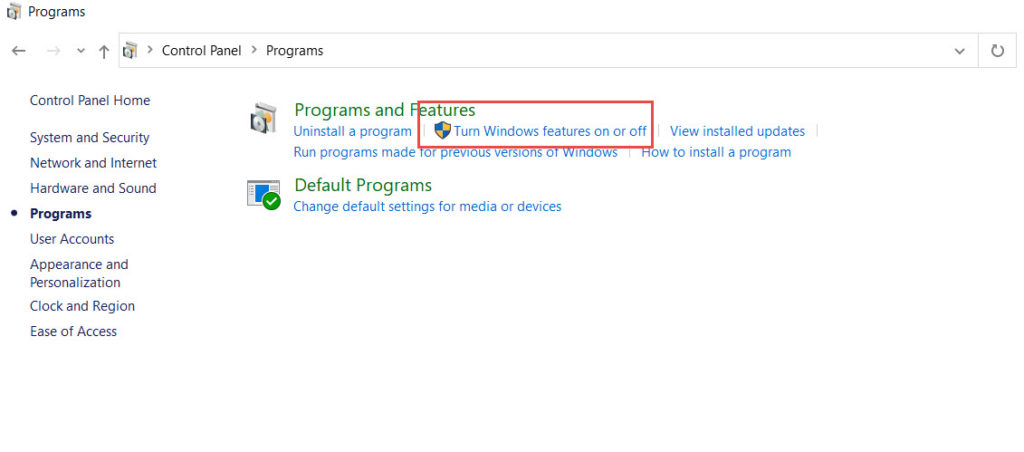
Step 2: After you’ve opened the Control Panel, go to Programs and Features.
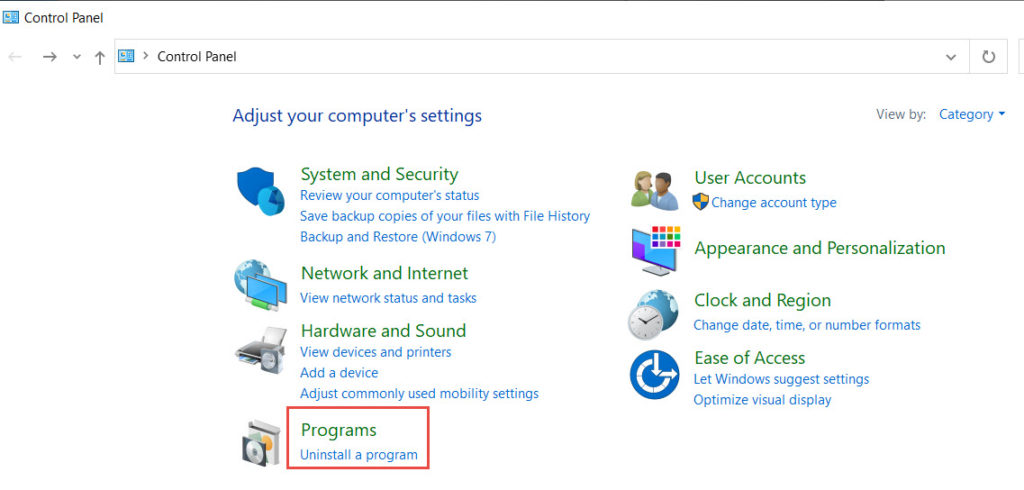
Step 3: click the option “Turn Windows features on or off” in Programs and Features.
Step 4: Locate the Hyper-V feature in the Windows Features window and tick all of the boxes.
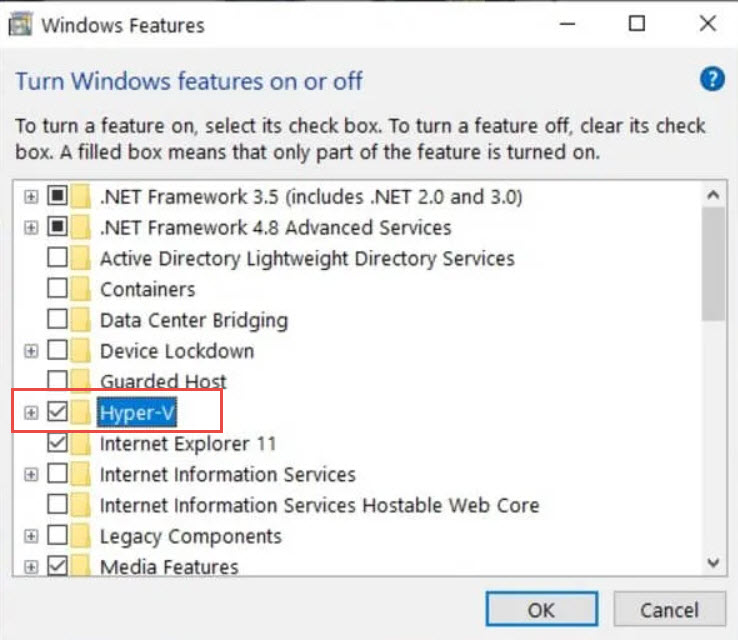
After that, Windows will install and configure Hyper-V, prompting you to restart and approve the modifications. It will then restart many times to complete the configuration of your machine.
Creating a Virtual Machine with Hyper-V:
You may launch Hyper-V when it has finished installing and use it to build virtual machines on your Windows 10 PC. Follow these steps to launch Hyper-V and construct a virtual computer.
Step 1: in Control Panel select Administrative Tools
Step 2: Select Hyper-V Manager from the Administrative Tools box.
Step 3: When Hyper-V starts, the name of your machine will appear on the left-hand side of the window. Choose a computer to work on.
Step 4: Choose New and Virtual Machine from the Action menu. You may also accomplish this from the Actions sidebar on the right-hand side of the app.
Step 5: Hyper-V will launch the New Virtual Machine Wizard to assist you with the virtual machine creation process. To construct a virtual computer with some basic parameters, click the Finish button. Advanced users can go to the next step in the process of constructing a customized virtual machine by clicking Next.
Step 6: The virtual machine will appear in the Hyper-V window once it has been built.
Virtual machines, like actual computers, require the installation of an operating system to function. Using the buttons on the right side of Hyper-V, you may switch them on or off.
Advantages of virtualization on Windows 10
- Virtualization will significantly improve your overall experience.
- Increased performance by 5 times
- Allows utilizing several CPU cores that eliminate FPS latency and stutter in a variety of games.
- Games may be played with the most advanced graphics settings.
