Last Updated: January 5th, 2024
If you are an Android user then you must be aware of Rooting. Rooting of Android devices enables the users to step ahead into a larger world of Android-based modifications providing the users with complete authority and acting as the main administrator of the device. Google by default provides the stock Android with a list of limitations to restrict the users with various important functionalities. The users find it difficult to use any RAM booster or task killer, difficulty in complete customization of the system, and no provision for improving the device’s battery consumption, etc to name a few. Accordingly, the successful implementation of Android Rooting allows the users to overcome all such limitations along with the added provision to completely remove and replace the operating system installed with the device as well. Unofficial upgrade procedures of the current Android version can also be carried out after successfully rooting up the device. Find the best ways of how to root Android.
Some key Benefits of Rooting Android Device
• Skyrocketing the phone’s speed and boosting better battery life.
• Successful removal of the Bloatware which keeps on consuming the battery and RAM by running in the background.
• Assurance of Crapware removal like System Apps.
• Boosting up the video streaming speed, Wi-Fi speed, SIM detection speed, etc.
• Added provision for installing a custom kernel and custom ROMs.
• Customizing the device by making the things look as per the desire.
How To Root Android Device Easily
The given list of ways can be implemented for successfully rooting the Android device in a single click:
1. Kingo Root Method

Any Android device can successfully be rooted using a Windows computer with just in a single click. There are extremely low chances of failure and the success rates range from 80-90%. Following the great list of features and added advantages, it is considered one of the best rooting software available in the market which can be done easily using the help of Windows-loaded personal computers. More improvements are expected to take place within the software’s interface as most of the creative and eligible developers are consistently working on the platform for betterment. One of the most important things to be kept in mind is that the pre-loaded anti-virus applications need to be removed from the computer for the successful processing of the rooting procedure.
The following list of steps is needed to be followed while doing the same using this rooting software:
1. Activate the USB debugging mode on the Android phone by selecting the Setting-Smartphone-Build number and tapping the same until it pops-up the message ‘You are now a developer’.
2. Again click on the Setting- Go to developer options- Tap USB Debugging.
3. The Kingo Root Windows application is needed to get downloaded and installed on the Windows-enabled personal computer.
4. After installation of the Kingo Root app, users will see a similar window for further operations.
5. Connect the Android smartphone with the PC. In case the device driver is not installed on the computer, then the software will automatically install it for the user’s convenience.
6. The root option in the form of a button will be there which is needed to get clicked for starting the rooting process.
7. The automatic rooting process will be done by the Kingo app and Super SU will be installed.
The device will thus get rooted by the software and users can even confirm the same by checking the ‘Super SU’ app on the device. The Kingo Root is one of the most widely used software with maximum success rates. In case, the same gets unable to function, another list of software can be implemented for the rooting procedures.
2. Rooting using CF-Auto-Root

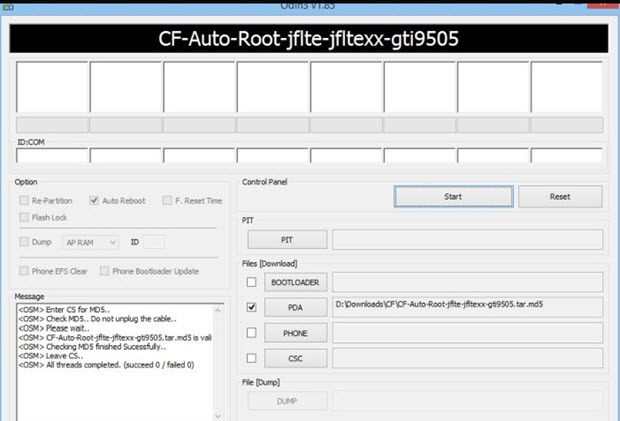
The users associated with devices like Samsung, Nexus, and Motorola generally prefer to select the CF-Auto-Root method for rooting Android devices. Keeping in view the different rooting methods for different devices, Chainfire has built up the CF-Auto-Root zip for every device for smoother functioning. Samsung Odin is required to make the rooting process easier in association with the CF-Auto-Root method.
The following list of steps is required to be followed in this rooting method:
1. Move for CF-Auto-Root page and press Ctrl+F. Type the name of the device and match the device code as well to ensure the best results.
2. Next to the device name, creatively download the CF-Auto root as well as ensure the already downloaded
3. The Android device needs to be switched off and rebooted into the download mode. In the case of Samsung-based, use the hotkeys Vol down+Home+Power for carrying out the procedures.
4. Check for ‘Auto Reboot’ and ‘F: Reset Time’ after successfully launching Locate for the downloaded file with CF-Auto-Root and click on the PDA.
5. Immediately click on the Start option to start the rooting phenomenon.
6. Users can even have access to rooting progress by using any root checker app.
3. Rooting Android using iRoot

iRoot facilitates the rooting procedures for most Android devices with different versions. iRoot was earlier known by the name vRoot and has always been the best choice for rooting process lovers.
The following list of steps needed to be followed by the rooting seekers for successful implementation of the processes:
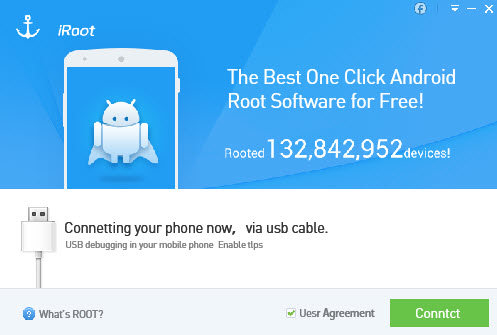
1. Launch iRoot after getting it installed over the system.
2. Activate the USB debugging using the essential list of procedures as mentioned above.
3. Finally, start the rooting process to carry out the procedure.
iRoot even assures frequent update procedures of the root scripts for maximizing success rates. Soon after clicking on the root option, iRoot will automatically search for the exploit procedures from the available servers and will root the device within a few minutes of operation.
Detailed rooting procedures associated with iRoot:
1. Download and install Root Genius for Windows preferably version Root Genius 3.1.3
2. Implement Android Root as administrator and get the Android device connected to the PC via USB cable for instant readouts.
3. Let the device drivers completely load for further processing.
4. Activate the USB Debugging mode by tapping the Settings option.
5. Instructions will be there associated with the Root Genius which needs to be followed by the users.
6. Continue the further procedures but read the notifications as well before proceeding.
7. Click on the Root start the Rooting process and let the USB be interconnected.
8. Within 2-3 minutes, the entire procedure will be completed and finally, the users can reboot their device to access the sole administrative activities.
9. Check the status of the finally completed rooting process by downloading and installing the Root Checker app from the Android Play Store.
4. Rooting of the Android device using vRoot

vRoot supports enabled compatibility features for rooting Android devices. It has been noticed and recorded that over 8000 Android devices are supported for successful rooting procedures using vRoot. It’s more than the imagination and provides much better speed and interface in the sense of rooting. The success rate depends upon the handling and management-based user’s creativity while talking about any of the rooting apps. However, the vRoot is capable of providing a success rate of 70-75% for rooting Android-enabled devices.
The following list of procedures needs to be followed for doing the rooting activity using vRoot:
1. Download the vRoot rooting app for PC.
2. Install the same, click on the nested tab, and launch the software for further steps.
3. Enable the USB Debugging mode inside the Android device and accordingly connect the device to the available personal computer (PC).
4. Access the vRoot from the PC and click on the Root option to immediately start the rooting process.
5. The users are required to stay static for a few minutes to notice the changes.
6. If the rooting process is successfully carried out, the device will automatically get rebooted.
7. The users can now comfortably disconnect the interconnected USB from the PC.
8. Successful rooting procedures can be checked by downloading any of the Root Checker apps from the Android Play Store.
9. Finally, the users can get administrative and complete control of the Android-enabled device to customize it as per their desire.
10. That’s all.
5. Root Android Using Towelroot
If you are searching for how to root Android without using a PC then TowelRoot is a great option. You will have to download and install the Towelroot app on your Android device, no use of the computer.
Steps for rooting Android using Towelroot
1. Download and install the Towelroot app on your Android device from the official website and click on the Lamda icon.
2. When the Towelroot app is installed on your device, launch it and tap on “Make it ra1n” to root.
3. Once your Android device restarts, download and install the Root Checker app to check the root status.
The rooting process has become a necessity for Android device holders who want to explore things by going deeper inside the system. The complete and sole administrative authority of the device equipped with an Android-like operating system enables the users to better access and customization facilities. All or any of the above-mentioned methods can be used for carrying out the rooting procedures in association with an Android-enabled device and a personal computer. The explained list of methods is the single click techniques for performing the rooting like a typical task. That’s all for a successful rooting operation.
The above-mentioned are the methods on how to root Android in a click.

Hi Shabnam,
Great post! You have shared such a wonderful post with detailed step by step information. Rooting definitely gives you lot of freedom to do things which you want to do with your device. Your steps are easy to follow and very helpful.
Thanks for sharing this post. have a good day. 🙂
Tarique Amir´s last blog post ..Computers in our daily life
I have heard about the rooting of this android device and it enables the users to get complete authority and act as the main administrator of the device. Google by default provide some limitations to its users but this android rooting facility helps you to overcome all such limitations. view